How To Tile A Floor And Wall
Tiling is an art and also a technical skill. Whether you are renovating the kitchen, bathroom, or giving a new look to the living room, the right way is to first tile walls when tiling. Tile the walls except the bottom row and then after cleaning the surface start the floor tiles by using 3/4/5 ruling. So, before you begin tiling, it’s important to understand the basics which surface to begin with, how to plan the layout, and how to pair wall and floor tiles to make the whole design look balanced. In this step by step guide we help you to understand how to tile a floor and wall.

Tools & Materials You’ll Need
These are some important tools used for cutting, measuring, cleaning, and for safety when starting tiling on the floor and wall:
Essential Tiling Tools
These tools help to make layouts, dimensions, cutting edges, measurements, and spreading the material.
- Notched Trowel
- Tile Spacers
- Chalk line or laserLevel
- Tile Cutters – Electric/Manual
- Measuring Tape
- Pencil
- Tile Nippers
- Bucket
- Mixing Paddle
- Scraper
- Rubber mallet
- Wooden Baton
- Step ladder
- Dust Sheet
- Sponges and clothes
- Dustpan and brush
Materials
These are the materials used for tiling and fixing.
- Floor/Wall tiles
- Thinset mortar
- Grout
- Tile backer board
- Waterproofing membrane
- Sealer
- Movement joint materials
Safety Gear
To tile on floors and walls these safety gears are must for tiling.
- Safety goggles
- Dust mask/Respirator
- Heavy-duty gloves
- Knee pads
- Ear protection
Preparing the Surface for Tiles
Take these key steps to prepare the surface before tile installation process:
1. Clean the Surface
This is the first step to prepare the surface for tiling, clean the surface from any type of debris, dust, oil, nails, plastic, or screws. Make sure that the surface is dry.
2. Repair and Level the Surface
Ensure that the surface of the floor is flat, fill the holes and cracks by plastering it to make the surface even. Interior floors should be uneven by no more than 5mm over 3 meters, while exterior floors or balconies can be uneven by up to 10mm over 3 meters.
3. Prepare the Substrate
If it is porous, means the cement or plaster which soaks the liquid fast, so apply a primer, and for extra stability, use a backer board or membrane to help the tiles stick firmly and prevent cracks.
4. Consider the Environment
New concrete will take at least 28 days to dry and to cure wet spaces like bathroom and balcony, and do proper waterproofing to prevent leaks and damage.
Planning the Layout For Tiles
Tile layout is a design technique to arrange the tiles. Check the basics of how to plan the layout so the whole design feels balanced.
1. Measure & Mark the Center
First off, find the center of your room or wall. For floors, measure and mark two center lines: one horizontal and one vertical. These lines give you a guide to keep cuts even on both sides.
How to plan a tile floor layout?
Start from the center and dry-lay your tiles to check the fit. See if you’re left with tiny slivers at the ends. If so, adjust your starting line a bit.
2. Establish a Square Layout Grid
Use a chalk line or laser level to create a grid. Draw lines in both directions to make sure everything is square. This keeps every row straight and at a 90-degree angle.
What are the rules for tile layout?
Keep all joints even with spacers. Avoid narrow cuts at corners. Start with full tiles at entry points or main walls for a neat look.
3. Create a Gauge Rod
Make a simple wooden strip or gauge rod marked with your tile size plus grout joints. It helps to see how many tiles fit in a line and what cut it needs at the end.
4. Check for Symmetrical Layout
Dry-lay everything to make sure cuts are even on both sides. This step keeps the layout balanced and gives your space a professional finish.
How to plan tile layout on a wall?
Mark the wall’s center and draw a vertical line. Put full tiles at eye level or your main focal point. Ensure equal cuts at corners for symmetry.
5. Prepare for Wall Tiling
For walls, put up a temporary straight wood strip ledger board at the bottom to stop tiles from sliding. Start tiling from the bottom up.
The 3/4/5 Rule for Tiling
When tiling a floor or wall, you want your layout to be perfectly straight and at a 90-degree angle. That’s where the 3/4/5 rule comes to help.
How it works:
- Measure 3 units like inches, feet, or meters along one side.
- Measure 4 units along the other side.
- Check the diagonal between those two points. If it’s exactly 5 units, your corner is a perfect 90 degrees.
Step-by-Step: How to Tile a Wall
Follow this guide to tile walls by yourself professionally.
Step 1 – Fix a Batten
- For wall tiling, first put up a batten, a wooden or metal strip.
- It gives support and keeps tiles from sliding down.
- This ensures the first row stays perfectly straight.
- The bottom row is usually installed at last for a neat finish.
Step 2 – Apply Adhesive and Lay Tiles Row by Row
Start spreading tile adhesive on the wall from the bottom and work up row by row in small sections using a notched trowel. Place spacers between tiles to keep grout lines even and check the level and alignment after each row.
Step 3 – Cut Tiles Around Sockets & Edges
To keep tile fitting neat and precise use cut tiles to fit around electric sockets, switches, or wall edges using a tile cutter, wet saw, or tile nippers.
Step 4 – Remove Batten and Finish Bottom Row
- Once the upper rows are done.
- When adhesive has set, remove the batten strip.
- Then, add the bottom row of tiles to fit perfectly above the floor.
- Allow them to cure for 24 hours.
Step-by-Step: How to Tile a Floor
Follow this step by step guide to tile a floor for giving a professional finish to your room floor.
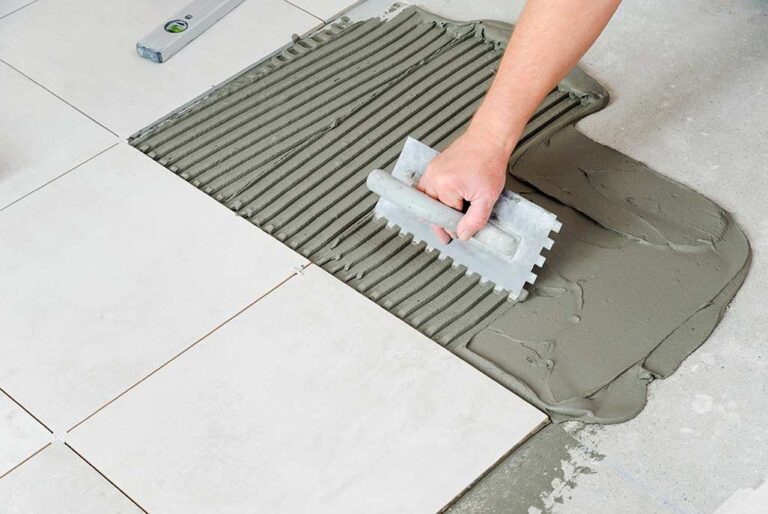
Step 1 – Mix and Apply Tile Adhesive
- Mix the tile adhesive thinnest mortar.
- Make sure the consistency is not too runny or too thick and can spread easily with a trowel.
- Use a notched trowel to apply it.
- Spread the adhesive at a 45-degree angle, creating ridges to stick tiles firmly.
Step 2 – Lay the First Row from the Center
Mark the lines of the center of the room and start from there. To start from the center both sides will get equal cuts and the design will look balanced. Place full tiles on entry points and the visible areas so it will give professional finish.
Step 3 – Insert Spacers for Even Gaps
Place spacers between tiles to keep grout lines straight and even. Spacers come in different sizes like 2mm, 3mm, or 5mm, so pick one that suits your tile size and design. This step keeps your grout lines neat and uniform.
Step 4 – Cut Tiles to Fit Edges/Corners
To fit the tiles in room corners and edges use a tile cutter or wet saw to trim tiles. For smaller pieces, tile nippers work well. Try to equal cuts on both sides to keep the layout looking symmetrical.
Step 5 – Check Level and Alignment
- After laying every 2–3 tiles.
- Check with a spirit level to make sure they’re flat and straight.
- If a tile is uneven, gently tap it with a rubber mallet to adjust.
- Avoid lippage, when one tile sticks up higher than another to keep the surface smooth.
Step 6 – Let Adhesive Set
After completing the floor tiling, give time to dry adhesive, usually for about 24 hours. Avoid walking on the floor during this time. When it is fully set, start applying grout.
Grouting and Finishing
- Grout Mix & Apply: Mix the grout, then use a rubber float to press it diagonally into the gaps between tiles to fill them evenly.
- Clean Excess Grout: After 10–15 minutes, when the grout starts to dry, gently wipe off extra grout with a damp sponge.
- Seal Grout: When the grout is fully dry after 24-48 hours, apply a grout sealer to protect it from stains and moisture.
- Finishing Touches: Add tile trims, corner beading, or silicone sealant.
FAQs on Floor & Wall Tiling
When tiling, do you do floor or walls first?
First, do wall tiling so the floor tiles can prevent damage and scratch. While doing the walls the extra adhesive and grout will not create mess on floor tiles that’s why it is best practise to do wall tiling first.
What is the 3/4/5 rule for tiling?
3/4/5 rule is a simple technique to align the tiles straight. Measure 3 feet and 4 feet from the centre point and check the distance between them. If the distance is exactly equal to 5 feet, then it means the layout has an accurate angle of 90 degrees.
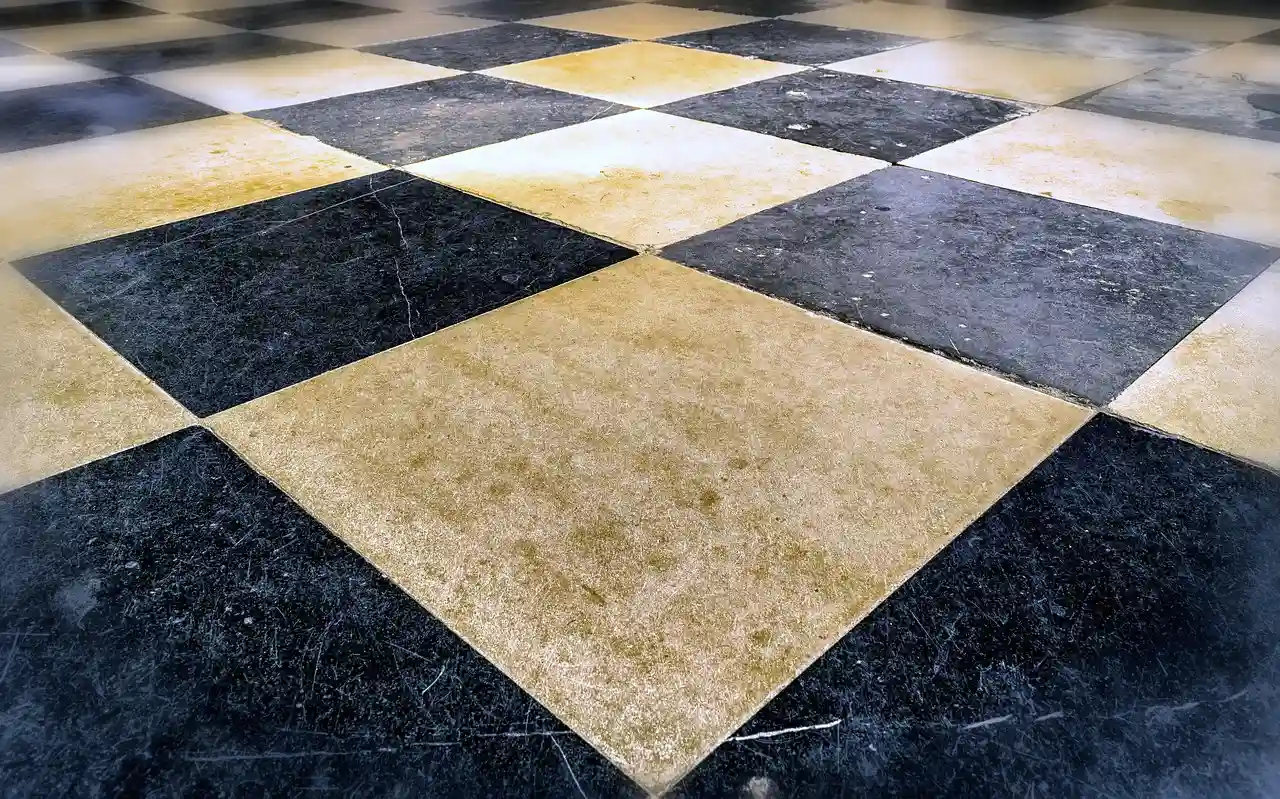
How to pair wall and floor tiles?
To pair wall and floor tiles be careful about these things:
- Light–Dark Contrast: Pair dark floor tiles with light wall tiles.
- Size Balance: Use larger tiles on the floor and smaller tiles on the walls.
- Texture Match: Combine glossy wall tiles with matte floor tiles.
- Grout Harmony: Choose a grout color that matches the tiles
Final Thoughts
Tiling is not only a part of the construction but an art to provide style and durability to your home. You can install tiles by yourself on the floor and wall by following a plan, proper tools, and correct techniques. To get a professional and elegant result always focus on layout planning, adhesive application, leveling, and finishing.